User Interface
As mentioned in the installation guide, ScanCode.io offers a web application to create and manage your projects from a browser. You’ll get access to this visual interface when you successfully install ScanCode.io locally.
To access the web application, open your web browser and visit http://localhost/ or http://localhost:8001/ if you run on a local development setup.
Note
All the capabilities offered by the ScanCode.io Web Interface are also available as Command Line Interface and in the REST API.
Home Screen
When you open the web application for the first time, the home screen will appear. From this screen, you’ll be able to create a new project, search your existing projects, view or download scan results, access documentation, and more.
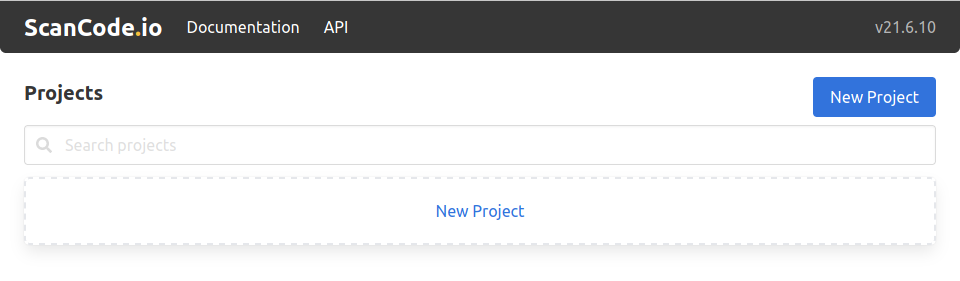
Creating a New Project
Creating a project is the first step that needs to be performed before you can start using ScanCode.io. There are two “New Project” buttons on the home screen, as shown in the previous screenshot. To create a new project, click on either button, and you will be directed to the “Create a Project” page.
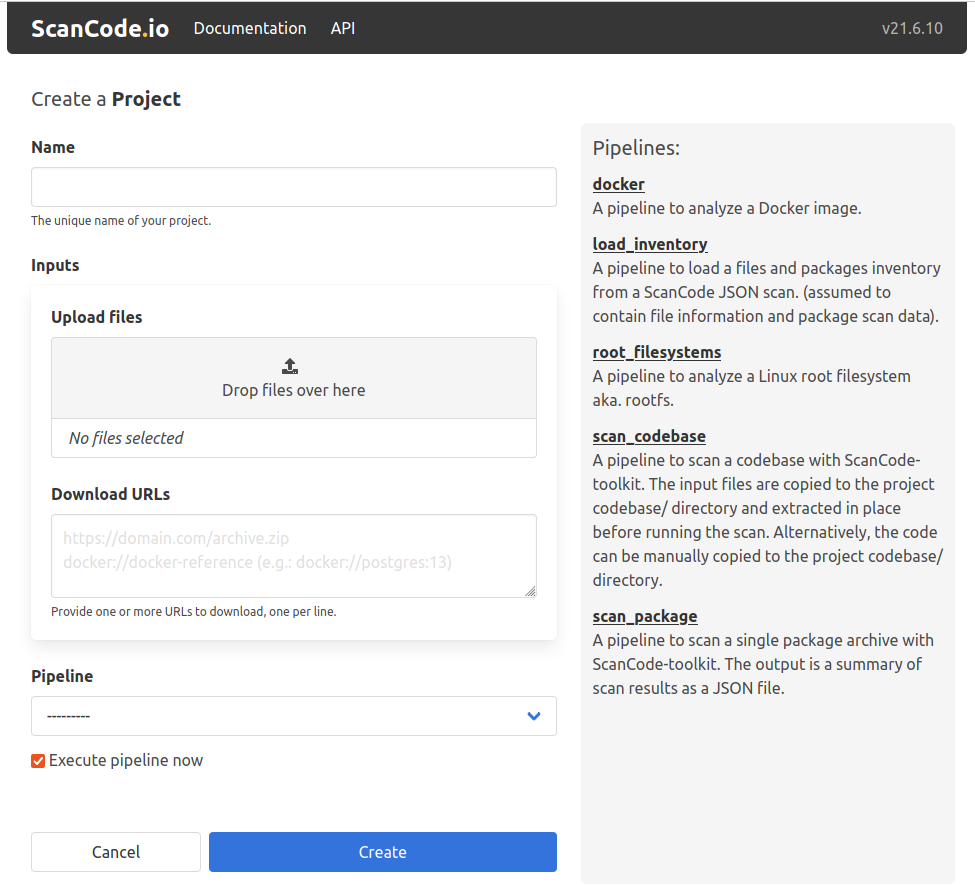
As shown above, creating a project involves filling in the following input fields:
Name
To create a project, you must provide a unique name for the new project.
Warning
A project name can’t be changed or edited once the project has been created.
Inputs
You can upload files available on your machine or add links to desired input files, such as package archives or Docker images, as the input to your project. If you are providing more than one URL as the project input, make sure to add one URL per line.
Tip
Docker images can be provided as inputs to be fetched using the
docker://docker-reference syntax in the “Download URLs” field.
For example: docker://postgres:13
Pipeline
Use the drop-down list to select one of the available pipelines depending on your use-case. When you add a pipeline, you can check the “Execute pipeline now” checkbox, which will add and execute the selected pipeline in one operation.
Note
If you’re not sure of which pipeline to select, refer to the pipelines details on the right pane of the “Create a Project” page, as shown above.
You can still create a new project while leaving the Inputs and Pipeline fields blank; however, it’s mandatory to provide a project Name!
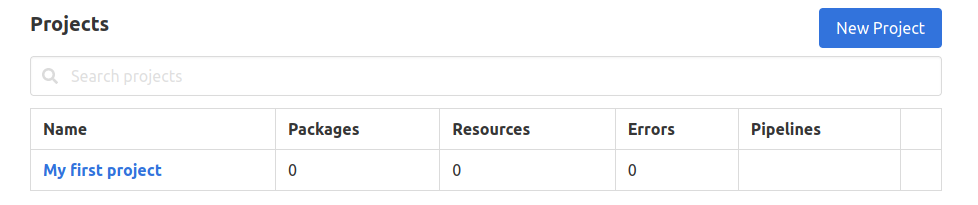
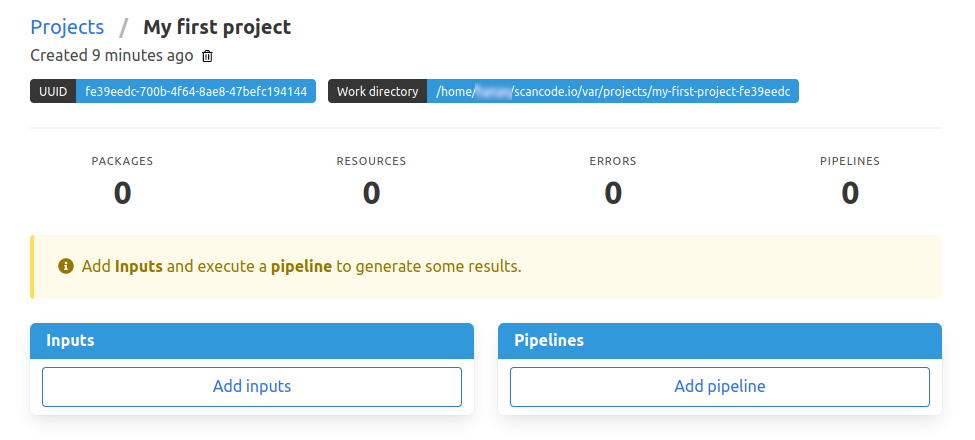
Once successfully created, you can later add any needed inputs and pipelines to your project by clicking the “Add inputs” and “Add pipeline” buttons.
Warning
You will not be able to add any extra inputs once a pipeline has been run on the project. However, you still can add and run extra pipelines as needed!
Within each project, you can view your project details, review the results of the pipeline execution, or download the output files.
Note
Please refer to the Output Files page for more details about your scan results.
Project Settings
The project settings form provides a convenient interface for editing essential project details and adding relevant notes. With this form, you have the ability to modify the project name, as well as include any additional notes you deem necessary.
In addition to managing project information, the form also offers configuration options that are related to the extraction process. You can specify a list of items to be ignored during pipeline execution, ensuring that only relevant content is considered. Furthermore, you have the option to customize the attribution template according to your specific requirements.
Tip
To generate the project configuration file scancode-config.yml, navigate to the
Project Settings UI and click on the Config file link in the left section under
Download.
Manage Webhook
The Manage Webhook section in the Project Settings view allows you to configure Webhook subscriptions for project pipeline execution events.
From the Settings page, you can:
Add a new webhook by specifying a target URL that will receive event notifications.
Edit an existing webhook to update its target URL, event triggers, or payload settings.
Delete a webhook to stop receiving notifications for that project.
Each webhook is associated with a WebhookSubscription and includes the following configurable options:
Target URL: The destination where the webhook payload will be sent when triggered.
Trigger on Each Run: Choose whether to send notifications after each pipeline run or only after all runs are completed.
Include Summary: Decide whether to include summary data in the webhook payload.
Include Results: Optionally include detailed scan results in the webhook payload.
Active Status: Enable or disable the webhook without deleting it.
Note
Ensure the target URL is correctly configured to receive webhook requests and process them accordingly.
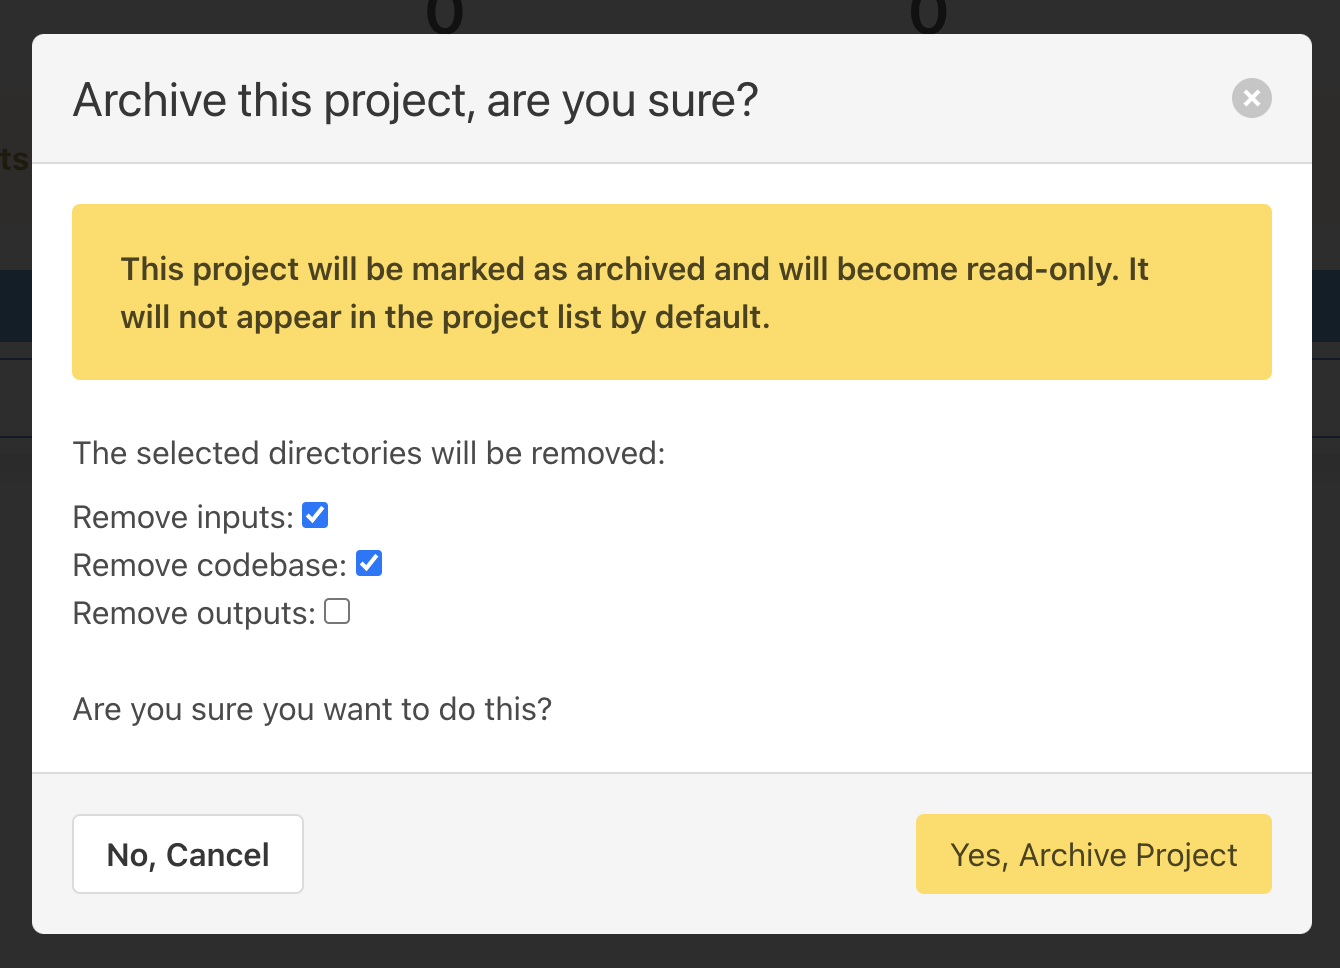
Archive a Project
After a project is complete, you may want to archive it to prevent any further modification to that project.
Archiving projects also makes navigating existing projects easier as the archived projects are hidden by default from the project list.
Selected Project workspace directories can be removed during the archive operation.
Tip
The project results are stored in the database and available to generate outputs at any time.
Note
A project cannot be archived if one of its related run is queued or already running.
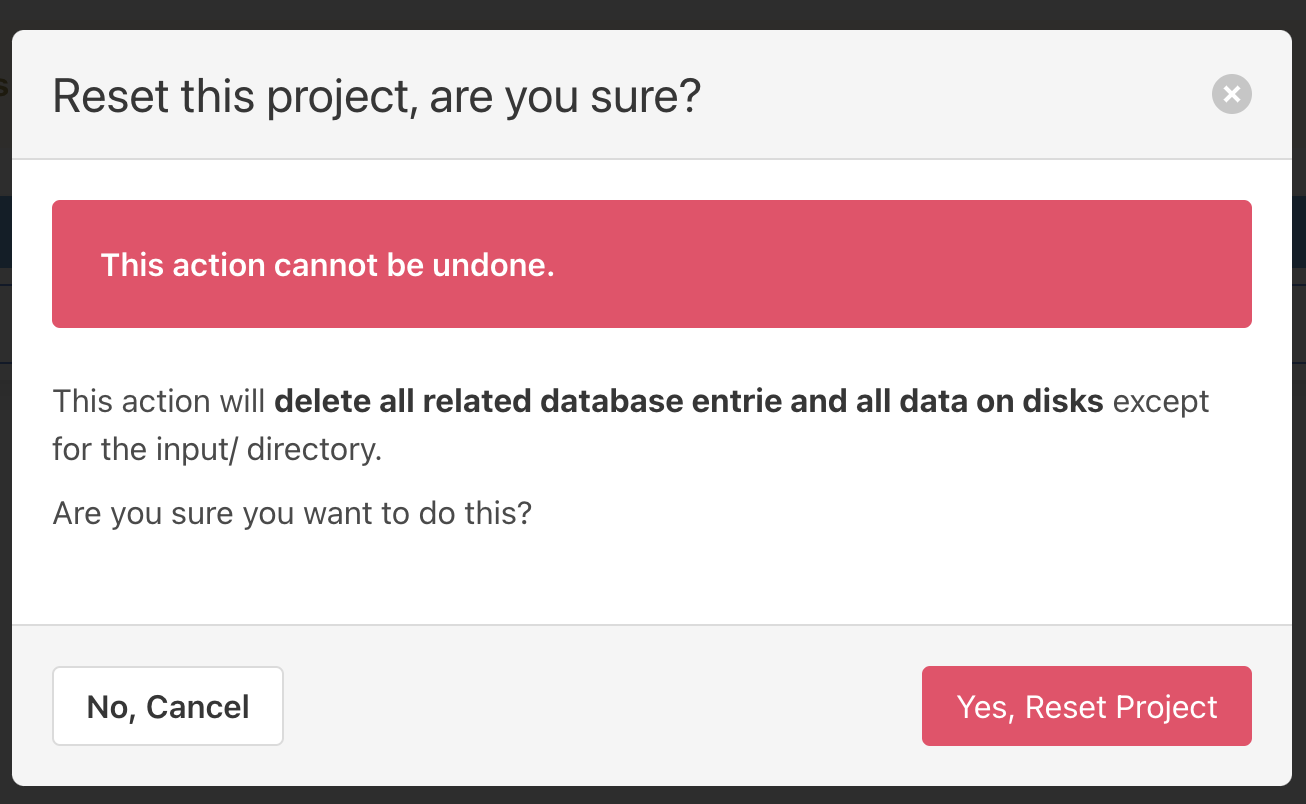
Reset a Project
The reset allows to wipe all database entries and all data on disks related to a project while keeping the input/ files. It can be used to re-run pipelines on a clean slate of the project without having to re-upload input files.
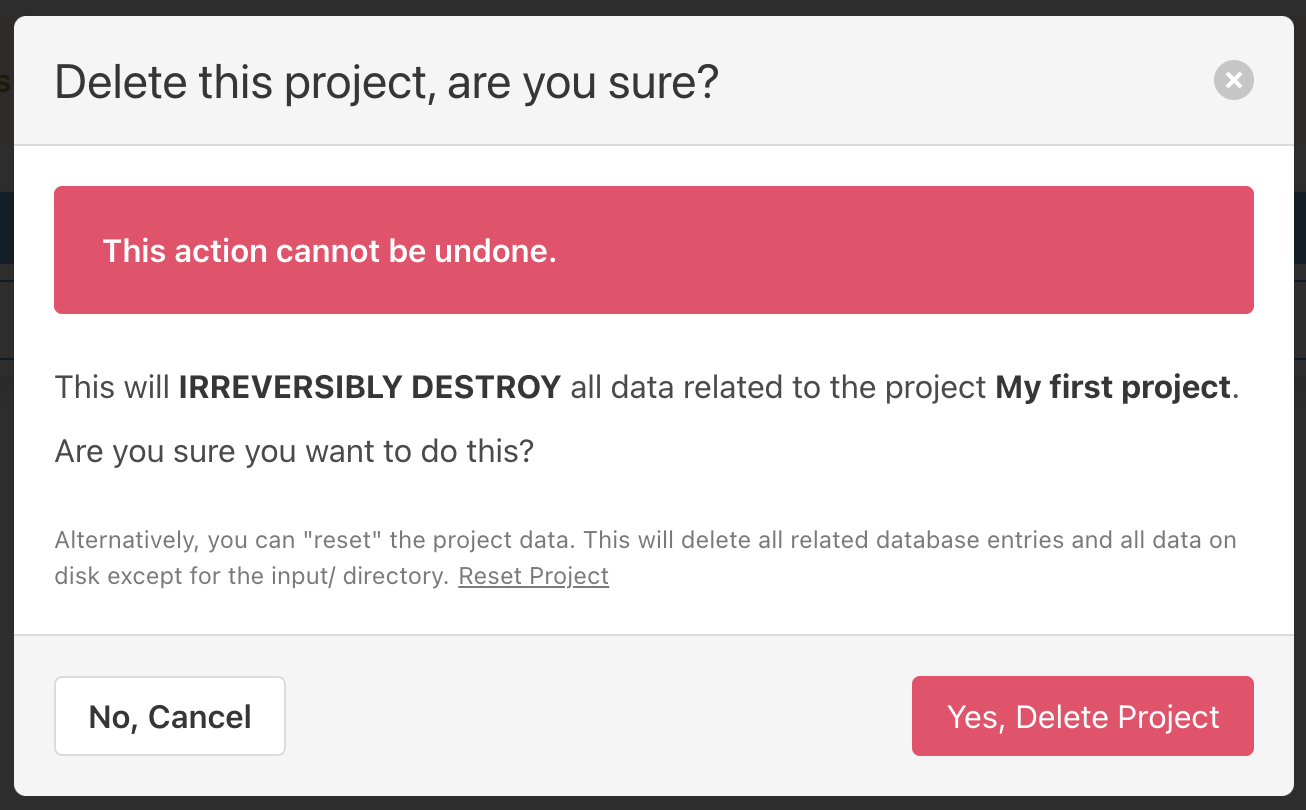
Delete a Project
If any of your projects is no longer needed, you can delete it from the project’s details page. Deleting old projects also makes navigating existing projects easier. Simply to delete any project, click on the trash icon under the project’s name.
Warning
Projects get permanently deleted and cannot be restored.
Search Syntax
When searching on objects list views, you can use a powerful search syntax to refine your queries and find exactly what you’re looking for. This guide will walk you through the search syntax and provide examples to help you get started.
Basic Search
Single Term: Enter a single word to search for exact matches.
Example:
file.txtQuoted Phrases: Use double quotes to search for exact phrases.
Example:
"name version"
Advanced Search
Field Searches: Specify fields to narrow down your search. Use
field_name:followed by your search term.Example:
name:file.txtNegation: Use a hyphen (-) before a field name to exclude results.
Example:
-name:file.txtLookup Types: Use lookup types to perform specific searches.
=: Exact match^: Starts with$: Ends with~: Contains>: Greater than<: Less than
Example: path^:dir1
Combining Queries
Multiple queries are combined with the AND operator:
Example: name:file.txt status:scanned
Examples
Here are some examples of advanced searches:
Search for Resources:
Find resources by name and license_expression:
name:LICENSE detected_license_expression:mitFind resources by path ending:
path$:directory_without_slash